How to Take a Screenshot on HP Laptop [2021]
Today, in this article, we are going to share with you on How to Take a Screenshot on HP Laptop easily.
Screenshot (SS) is the term used when someone wants to take a screenshot.
The screen can be a variety of views. For example videos, browsers, games, and others.
Screenshots can be done on any device. Including HP laptops.
How to Take a Screenshot on HP Laptop [2021]
Here will be explained how to screenshots on HP laptops. Can be for all types/series, for example like:
- HP Envy 14-eb0021TX
- HP Envy 15 (2021)
- HP Victus 16 E Series
- HP Pavilion Aero 13
- HP Victus 16 D Series
- HP Chromebook 11a
- HP Pavilion 15-eg0103TX
- HP Pavilion 14-dv0053TU
- And another series.
Here’s how:
#1. ALT + Print Screen
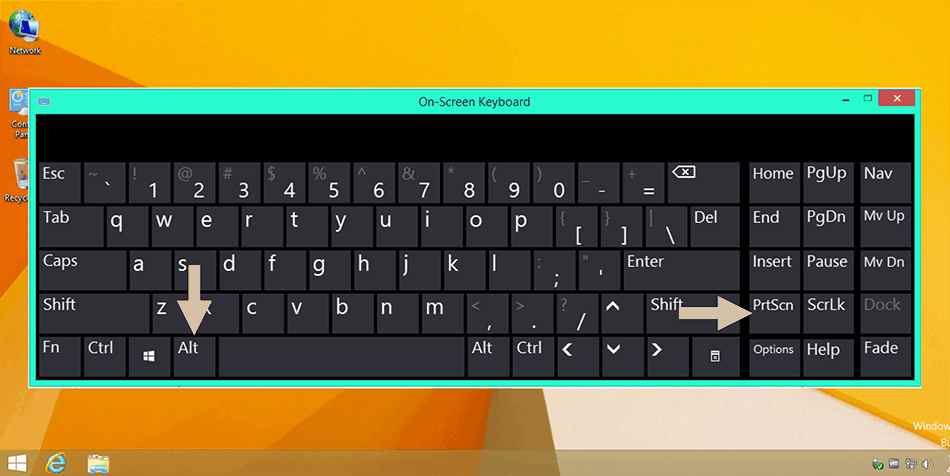
The first way, you can use the screenshot feature is by pressing the Alt + PrtSc keys on the keyboard.
Later the system will automatically capture the image in the currently active window. Then copy it to the clipboard.
After that, paste it into the picture editing application, for example in the Paint application, PowerPoint, and so on. Then the screenshot will appear in the application, then you can save it.
#2. Snipping Tools
Snipping Tools. This application is available directly on the Windows 7, 8, and 10 operating systems.
Since the base is built-in, you can open it directly
How to use it like this:
- First, open the Start Menu on your HP laptop.
- In the search type Snipping Tool and press Enter.
- The Snipping Toolbar window will appear, click New, and then select Free-form Snip or Rectangular Snip.
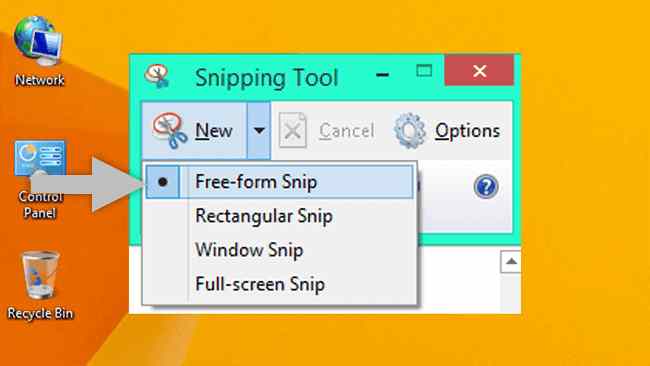
| Free-form Snip | For those of you who want to take pictures with the shape you want |
| Rectangular Snip | For easier screen capture in square shape. |
4. Start to take screenshots as you wish.
5. If so, you will be directed to the edit window. Where you can make edits such as marking objects or adding strokes.
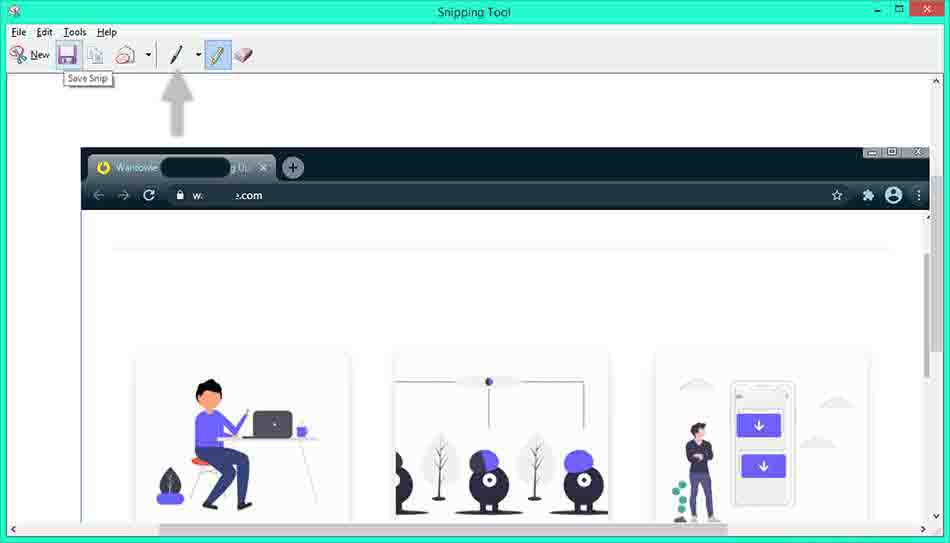
6. Finally, click Save. Save it in a folder and name it as you wish.
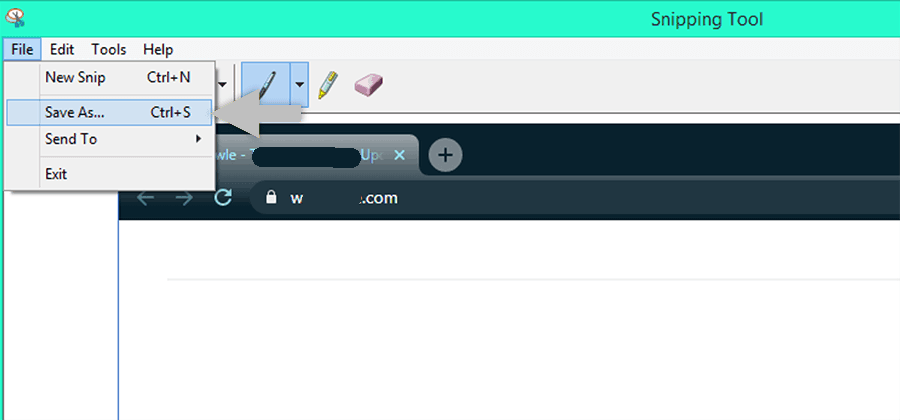
The Snipping Tools application is highly recommended if you want to capture images of certain objects only.
Because in this application, you can customize the object yourself.
#3. Print Screen + Win
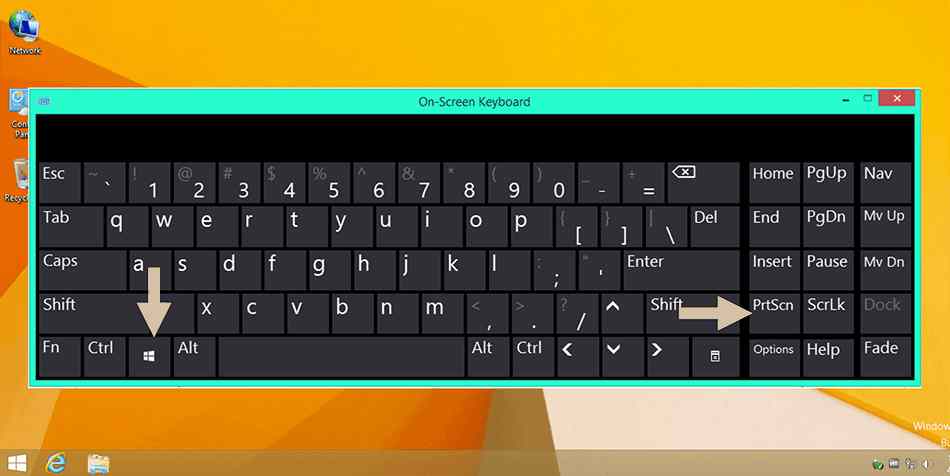
Use the PrtScn + Windows key combination to capture the screen image. This method is similar to the first.
It’s just that when you press the PrtScn + Windows key, the screen will turn black which indicates you are capturing an image.
In addition, if you use this method, you also don’t need to use a picture editing application to save images. Because the image is automatically saved in your storage.
Note: Please check the C:\Users\USER\Picture\Screenshot folder to find the SS result from the imi key combination.
#4. Windows Key + Print
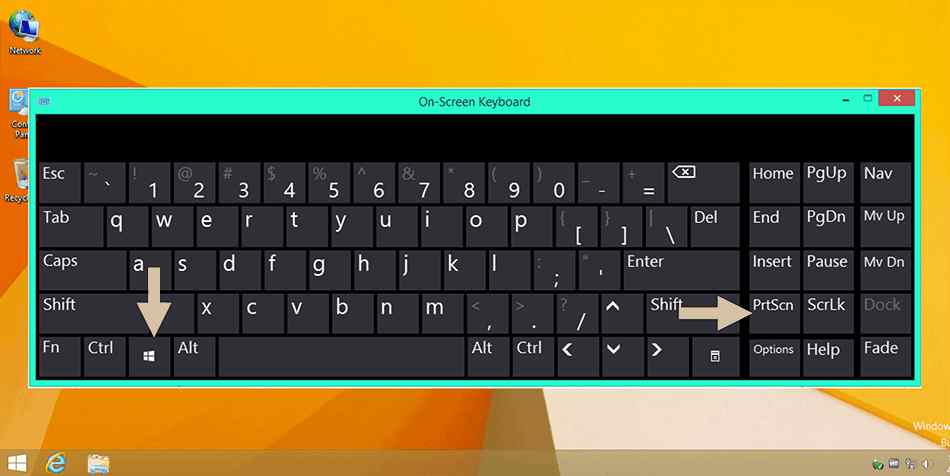
For this method, it is actually the same as the previous one. It’s just that you can add the Fn key to the shortcut.
So, you need to press the key combination Fn + Windows + PrtScn at the same time.
When pressing the button, the screen will temporarily dim indicating that a picture is being taken.
Well, automatically your screenshots will be stored in laptop storage. You can see it in the Pictures – Screenshots folder.
#5. Windows + H
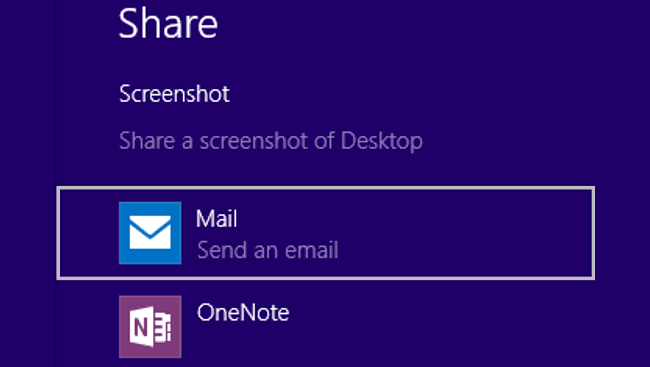
Takes screenshots, but can be sent immediately or shared via social media.
You just need to press the Windows key + H on the HP laptop keyboard. After pressing the button, the Windows Share Toolbar will appear.
You can share the screenshots with others via Facebook, Gmail or E-mail, Twitter, One Note, and others.
You can use this method on Windows 8, 7, and 10.
#6. Windows + Down
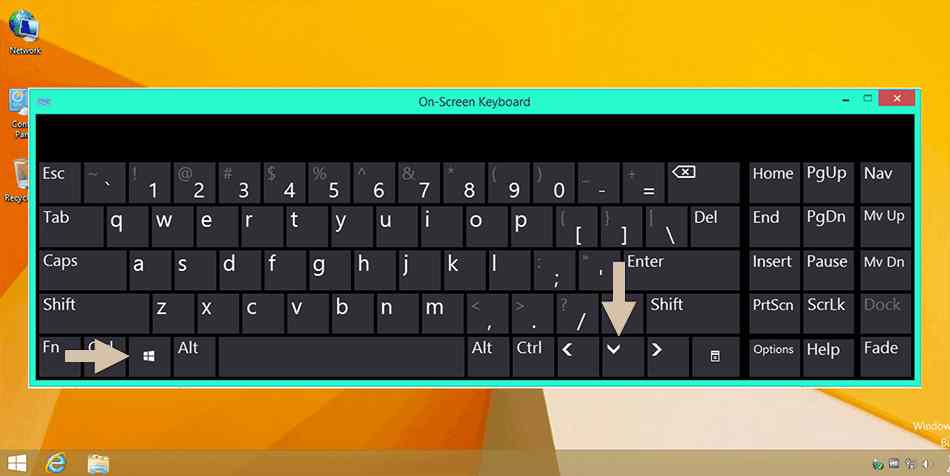
Use the key combination of Windows + Down on HP laptops to capture the screen.
More or less this method is also the same as the previous two methods.
Later the image that you have captured will be stored in the Pictures – Screenshot folder.
#7. Snip Editor
Just like Snipping Tools, Snip Editor also has a function to capture the screen. But when it comes to features, Snip Editor is slightly superior.
In this application, you can capture images from the active window, crop certain parts to the entire area.
In addition, you can also add recordings to the captured results.
- First, you open the Snip Editor application on the laptop.
- Then, three icons will appear that you can do to take pictures.
- If you want a screenshot, you can click the Plus Marked Box icon or Capture.
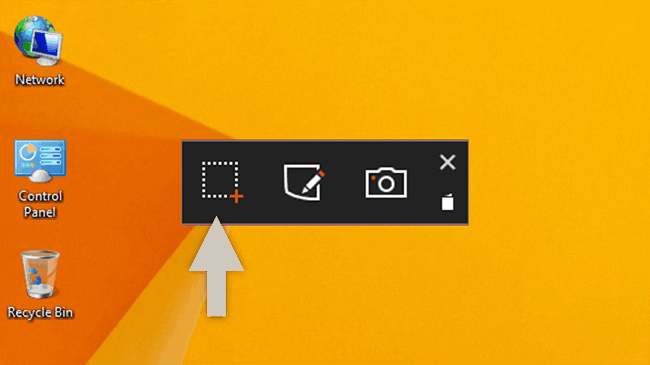
4. After that, set whether you want the full screenshot or only certain parts.
5. If so, you will be directed to the editor window. Where you can add something like writing, doodles, even sound though.
6. If you want to save it, you just need to click Save.
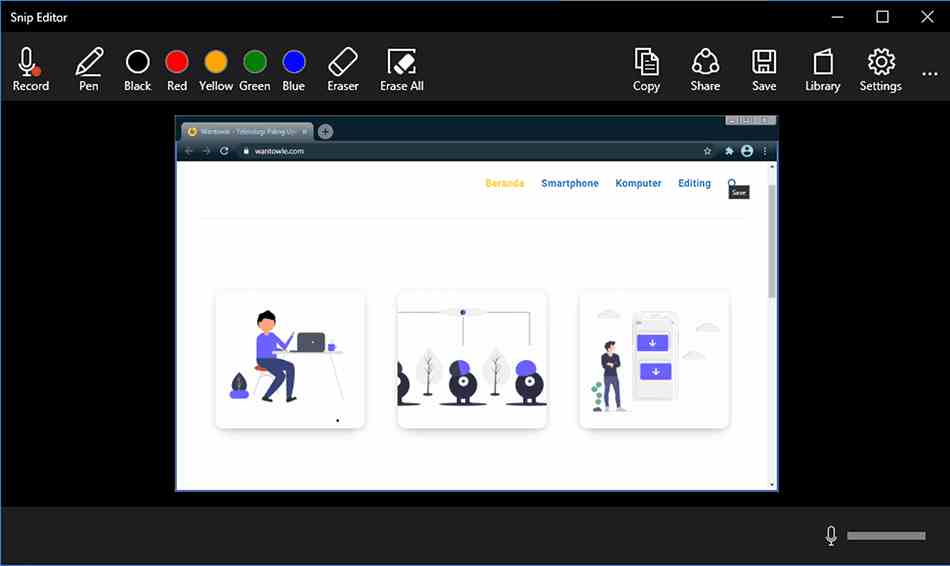
7. Then, save it in the desired folder.
You can install and use this application on Windows 8.1, 7, and 10. The way to use it is also the same as above, so it can be said to be quite practical.
Closing
So, those are some ways to take screenshots on HP laptops or notebooks.
The method is quite simple because you can choose to use certain buttons or through the application.
In addition, the method that has been given can also be used on the Windows 10, 8, and 7 operating systems. Good luck.
from TechMaina
SOURCE TGG
Comments
Post a Comment