How to Install WSL on Windows 10 [2021]
How to Install Windows WSL on Windows 10 (Subsystem For Linux) – Windows Subsystem For Linux or what is known (WSL) is an optional feature of Windows 10 that can allow Windows users to run Linux programs on Windows.
Previously I wanted to make an article on how to install Windows Subsystem for Linux on Windows 10, but I haven’t had time because I’ve been busy with my small activities:v
Maybe hearing the word WSL (Windows Subsystem For Linux) you feel a bit confused and definitely don’t understand what wsl is.

Understanding Windows Subsystem For Linux (WSL)
The Windows Subsystem for Linux (WSL) is a compatibility layer for naturally running Linux binaries (in ELF form) on Windows 10.
Microsoft and Canonical are working together to enable the Ubuntu Trusty Tahr package which can be downloaded and extracted to Windows 10.
Local computer, and for the devices and utilities contained in the package to run naturally on top of this subsystem.
This subsystem provides a compatible Linux kernel interface developed by Microsoft (without containing Linux code), with the user-mode binary from Ubuntu running on top of it. (Reference Source: Wikipedia )
How to Install Windows Subsystem For Linux (WSL) Ubuntu 20.04 LTS on Windows 10
After you read the understanding of Windows Subsystem for Linux (WSL) then how to Install Windows Subsystem For Linux (WSL) on Windows 10? for a guide on how to install wsl (Windows subsystem for Linux) you can see it below.
1. Go to Control Panel
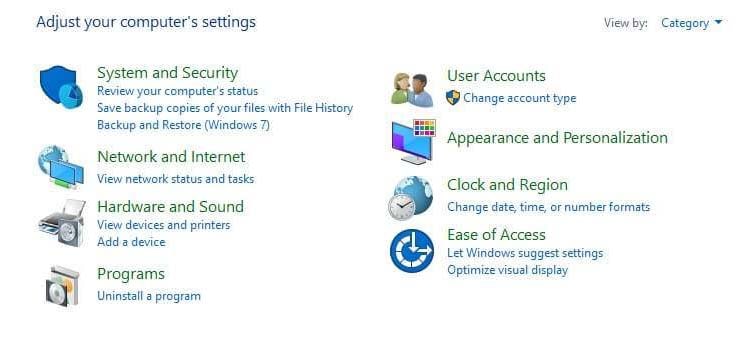
The first step to activate WSL (Windows Subsystem For Linux) you enter the Windows 10 control panel menu, then enter the Programs feature menu
2. Programs and Features
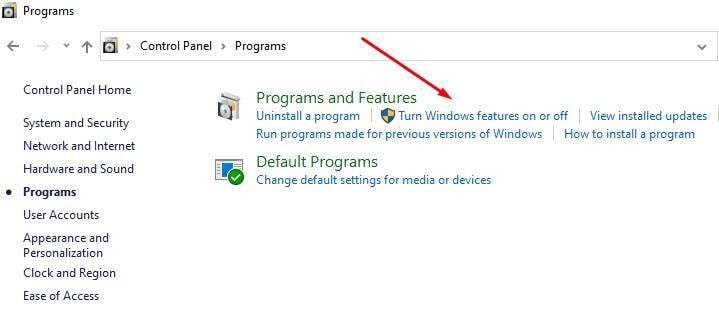
Once in the Programs And Features feature, you look for Turn Windows Features on or off then click.
3. Enable Windows Subsystem For Linux Features
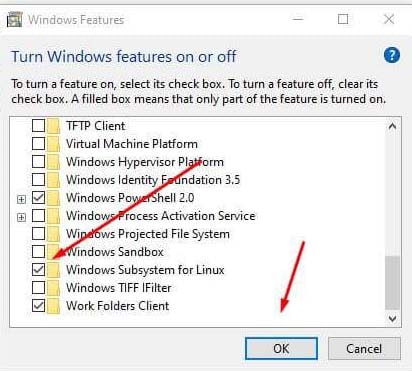
After being in the Turn Windows features on or off-menu, you drag down until you find the Windows Subsystem For Linux feature then check it and click ok, after that restart your computer or laptop. after you restart automatically WSL (Windows Subsystem For Linux) will be active.
4. Download Linux via Microsoft Store (Kali Linux, Suse Linux, Ubuntu 20.04 TLS, Ubuntu, Ubuntu 18.04 LTS, and Debian)
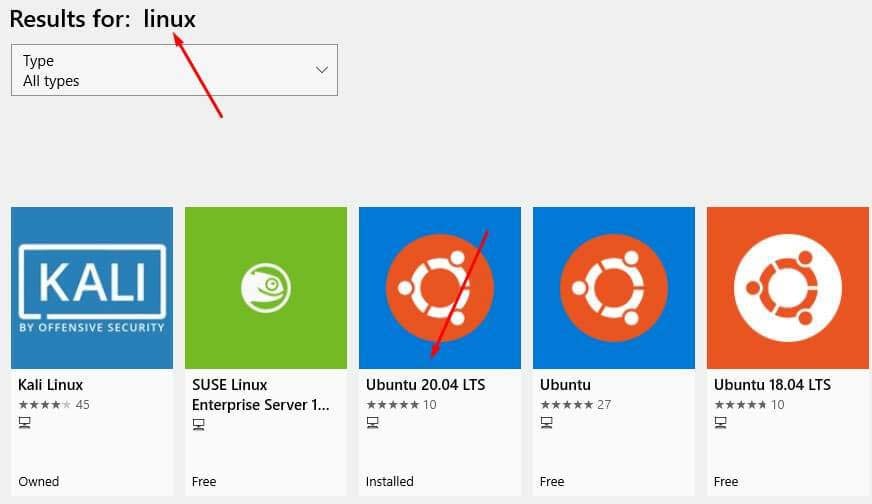
After being in the Microsoft store , you type the keyword “Linux” then later the results of the keywords you typed will appear, later you will find several Linux distros, such as Kali Linux, Linux suse etc, because I want to use the ubuntu 20.04 LTS terminal so I choose Ubuntu 20.04 LTS, if you want to use another Linux operating system terminal, you can choose the one that has been provided, then click install, after the install process is complete click launch (run)
5. Run Ubuntu 20.04 LTS On Windows
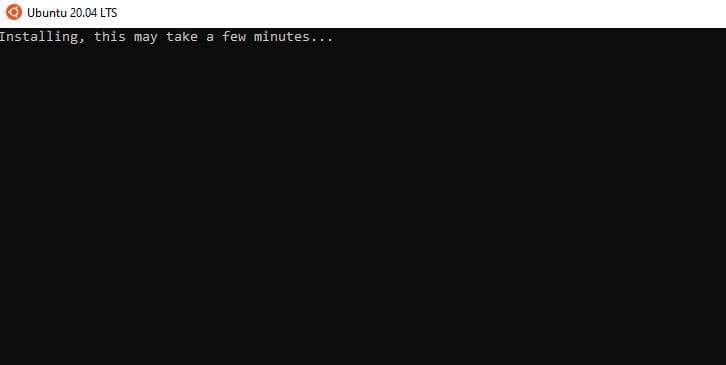
After you run the ubuntu 20.04 LTS terminal, in the Installing section, this may take a few minutes… you are asked to wait until the ubuntu 20.04 LTS installation process is complete and wait a few minutes.
6. Create an Ubuntu Username and Password
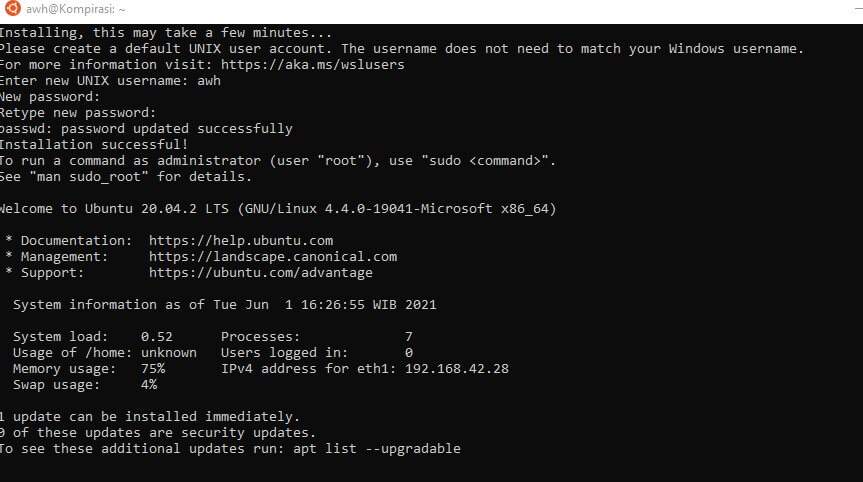
After you have created a WSL Ubuntu username and password on Windows 10, it means that you have successfully installed Windows Subsystem For Linux (WSL) Ubuntu 20.04 LTS on Windows 10.
In addition to checking your ubuntu version, write the command “lsb_release -a” then press enter, the following screen will appear.

What do you think, it’s easy, isn’t it a tutorial on how to install Windows subsystem for Linux on windows 10, thank you so much, I hope this article is useful.
from TechMaina
SOURCE TGG
Comments
Post a Comment