How To Disable Lock Screen Windows 10 [Easy&Fast]
Disable Lock Screen Windows 10: Lockscreen , what is it? In short, the lockscreen is a screen when Windows is not running. Or if it is in English, it is also called idle mode.

Broadly speaking, the lockscreen has at least 3 main functions, including:
- To improve power efficiency.
- To lock the computer.
- Keeping the computer stable.
As for the way it works, there are two ways, namely the lockscreen is active when the computer is not running the process, or the lockscreen is activated manually.
This feature already exists on Windows 7, Windows 8, and Windows 10, and is usually the most automatic setting is on.
So, then, can we turn it off? The answer, of course, is yes. Here I will explain the steps.
How To Turn Off The LockScreen In Windows 7, 8, and 10
The lockscreen feature is actually quite useful, but why would anyone want to disable it?
The reasons are of course various.
For myself, for example when I’m not at the computer, but I want to keep the screen on. The goal is that when you return, work can be continued immediately.
Or when I’m running an application that has to run continuously. For example, during the application install process. Of course, I still have to keep the screen active, right?
There are at least 2 ways that I will share here, namely:
- Through the Control Panel.
- Via Regedit.
The following is the discussion:
1. How to Disable Windows Lockscreen Through Control Panel
The first way, through the Control Panel. We can access this setting window in all versions of Windows, both old versions and the latest versions.
Well, here we can also set the lockscreen to be inactive.
For the steps themselves like this:
- Step 1 . First, click Start > Look for Control Panel > Then open the program.
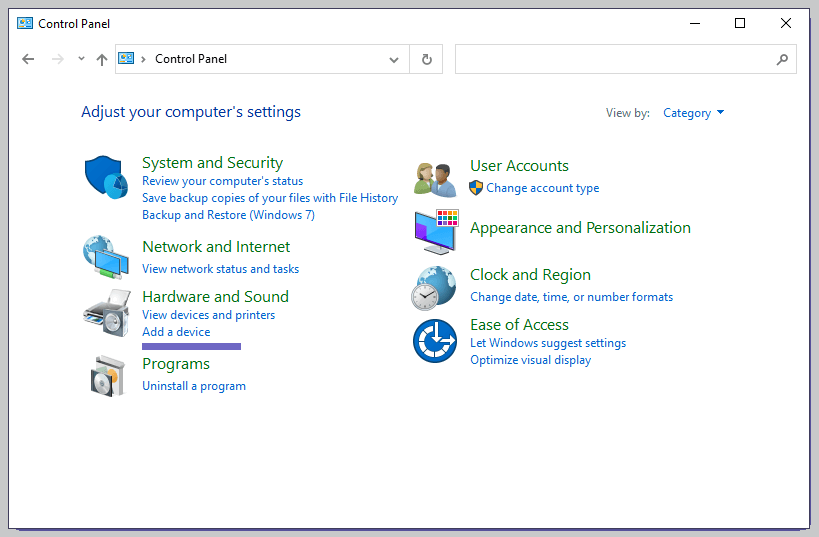
- Step 2 . Next, go to the Hardware and Sounds menu.
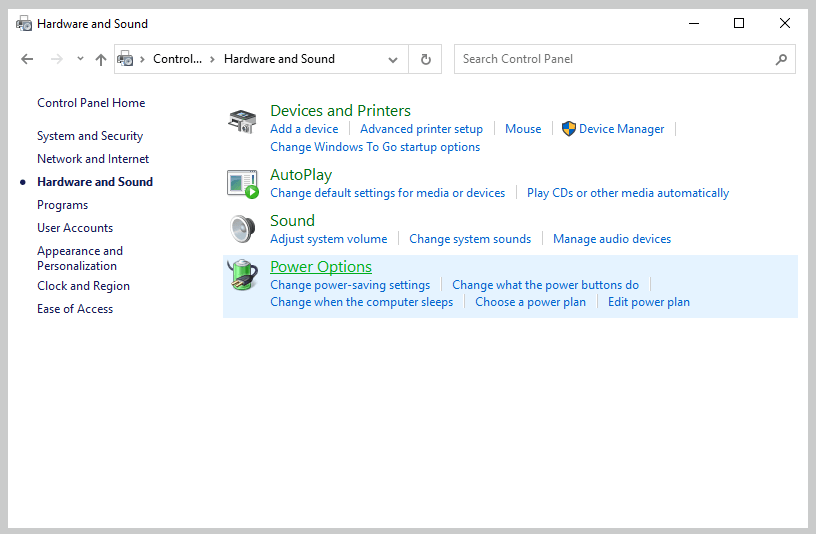
- Step 3 . Click the Power Options button.
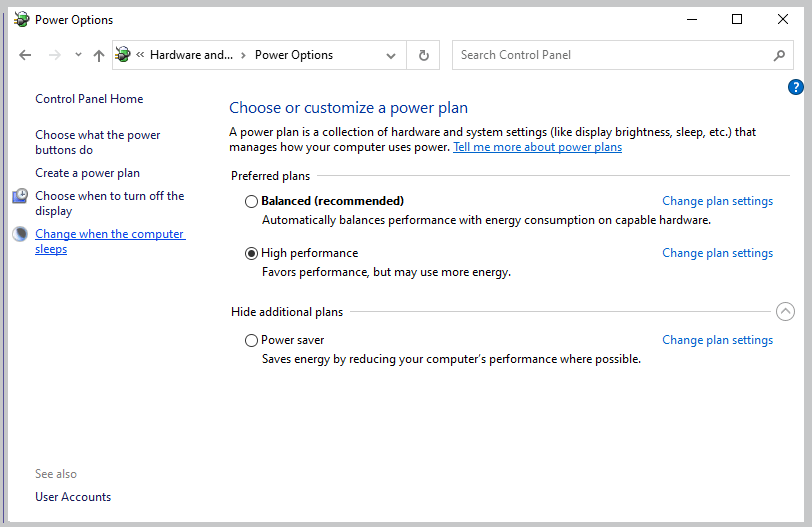
- Step 4 . On the left, click the Choose when the computer sleeps option again.
- Step 5 . Set the Turn off the display to Never.
- Step 6 . Set also on the column Put the computer to sleep into Never.
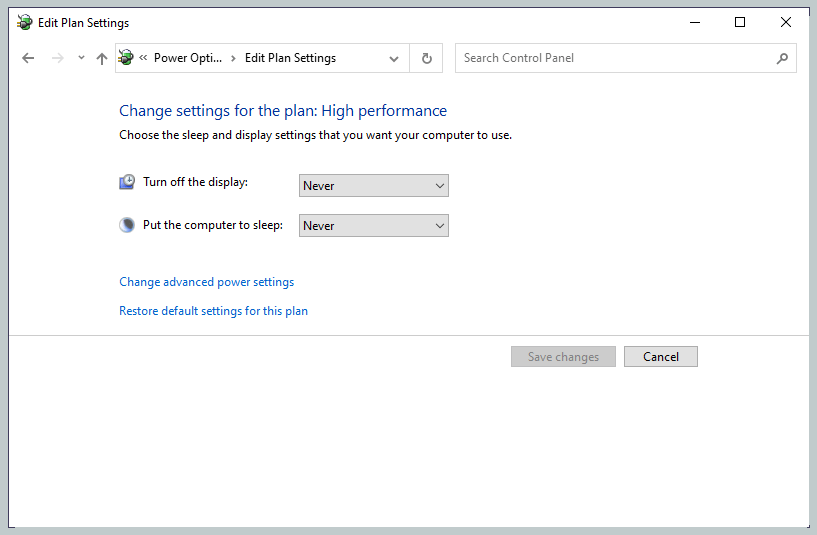
- Step 7 . Click Save Changes to save the settings.
This setting will make the monitor continue to be active, even though we are not using it for a long time.
If you want to adjust it again you can, really For example, in half an hour, 20 minutes, and so on. It’s free.
For more details, you can also click Change Advanced Power Settings.
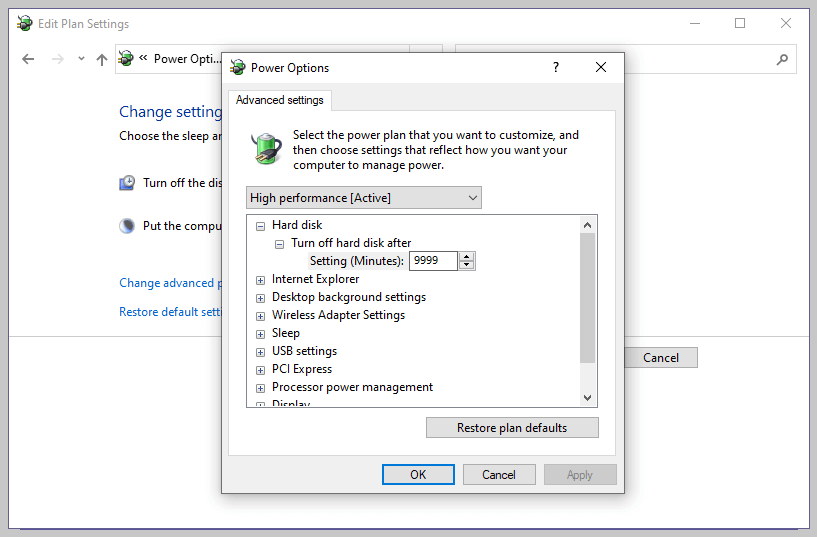
There is a Turn off hard drive setting. This setting is made to be disabled. The trick, set the value to be large. For example, like the example in the image above.
2. Disable Lock Screen Windows 10 Via Regedit
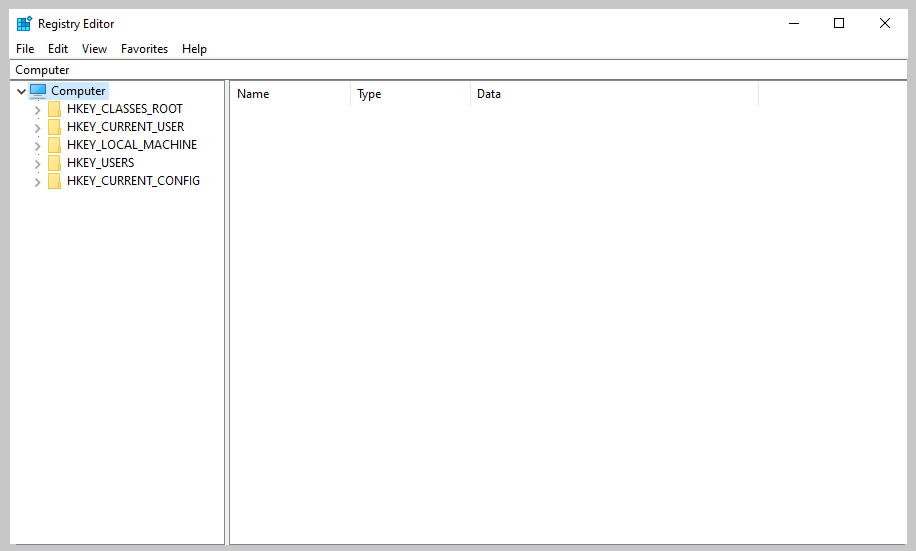
The second way is through Regedit. For this one, it might seem a little difficult. But actually, it’s really simple.
We only need to make special settings on the Windows system folder. For the steps, please follow the following guidelines:
- Step 1 . Click the Windows + R.
- Step 2 . Type ” Regedit “, then please click OK.
- Step 3 . Next, enter the following directory:
HKEY_LOCAL_MACHINE \ SOFTWARE \ Policies \ Microsoft \ Windows.
- Step 4 . Open the Windows folder. Right-click, then select New > Key.
- Step 5 . Fill in the name ” Personalization “, then OK.
- Step 6 . Next, on the right, right-click and select DWORD (32-bit). Fill in the name to ” NoLockScreen “.
- Step 7 . Double click on the settings ( registry ), then fill in the Value with the number ” 1 “.
- Step 8 . Press OK.
Now just restart the computer. Thus, the lock screen feature will change to the off position.
If you want to reactivate it, just delete the NoLockScreen registry that was created earlier, or you can also change the value to 0.
The Final Word
That’s the discussion about how to disable the lockscreen feature in Windows. This tutorial can at least be applied to Windows 7, Windows 8, and Windows 10. In general, the steps are like that.
In closing, for those of you who may still have questions about this discussion, you can send these questions via the comments box below.
Hope it is useful.
from TechMaina
SOURCE TGG
Comments
Post a Comment